Introduction
In modern networks, one of the fundamental practices is dividing the network into multiple subnets to enhance efficiency, security, and management. Virtual LANs (VLANs) play a pivotal role in achieving this segmentation. However, for communication between devices on different VLANs, a routing solution is needed, and this is where Router-on-a-Stick comes into play. It is a method of inter-VLAN routing that uses a single physical router interface to route traffic between multiple VLANs. In this blog, we will dive into the technical aspects of Router-on-a-Stick, the requirements to perform it, and its role in modern networking. This approach is widely adopted due to its simplicity, scalability, and cost-effectiveness, especially in smaller and medium-sized networks. As we explore Router-on-a-Stick routing, we’ll also cover sample MCQs that reflect the knowledge needed to prepare for certifications like CCNA, which you can find on DumpsQueen.
Understanding VLANs and Inter-VLAN Routing
Before delving into the specifics of Router-on-a-Stick, it’s essential to understand VLANs and the concept of inter-VLAN routing. A VLAN (Virtual Local Area Network) is a logical grouping of devices that can communicate with each other as if they are on the same physical network, regardless of their actual physical location. Inter-VLAN routing refers to the process of enabling communication between devices located on different VLANs. Without inter-VLAN routing, devices on one VLAN cannot communicate with devices on another VLAN, which severely limits network functionality. Traditionally, a Layer 3 switch or router is used to route traffic between VLANs, but Router-on-a-Stick is an economical alternative.
The Basics of Router-on-a-Stick
Router-on-a-Stick is a configuration that uses a single physical router interface to provide routing between multiple VLANs. This technique is implemented by creating subinterfaces on the router’s physical interface. Each subinterface corresponds to a different VLAN and carries the routing information for that VLAN. In a typical Router-on-a-Stick configuration, a router will have one physical interface connected to a multi-VLAN switch. The switch trunk port connects to the router’s subinterfaces, each tagged with the corresponding VLAN ID. When a device in one VLAN wants to communicate with a device in another VLAN, the router processes the traffic based on its subinterface configuration and forwards it accordingly.
Requirements for Router-on-a-Stick Configuration
To successfully implement Router-on-a-Stick inter-VLAN routing, several key components are required. Let’s break them down into the crucial elements of the setup.
1. A Router with Multiple Subinterfaces
The first requirement for Router-on-a-Stick routing is a router with the capability to create multiple subinterfaces. A subinterface is a logical division of the physical router interface that allows it to handle traffic for different VLANs. The router will assign each subinterface an IP address corresponding to the VLAN it is serving.
Example of Subinterface Configuration:
interface gigabitethernet 0/1.10
encapsulation dot1Q 10
ip address 192.168.10.1 255.255.255.0
In this configuration, the router is set up to handle VLAN 10 traffic on the subinterface gigabitethernet 0/1.10. The router will route traffic between VLANs based on the IP addresses assigned to each subinterface.
2. Trunking on the Switch
For Router-on-a-Stick to work, the switch port that connects to the router must be configured as a trunk port. A trunk port is designed to carry traffic from multiple VLANs, and it uses tagging (802.1Q) to identify which VLAN each frame belongs to.
Example of Switch Trunk Configuration
interface fastEthernet 0/1
switchport mode trunk
switchport trunk encapsulation dot1Q
In this configuration, the switch port fastEthernet 0/1 is set up to carry traffic from all VLANs (specified by the encapsulation method dot1Q). This allows the router to handle traffic from multiple VLANs through the trunk link.
3. VLAN Configuration on the Switch
Each VLAN must be created on the switch before it can be used in a Router-on-a-Stick configuration. The switch must have the VLANs properly configured to separate traffic logically and provide clear paths for routing.
Example of VLAN Configuration:
vlan 10
name Sales
vlan 20
name HR
In this example, VLAN 10 is assigned to the Sales department, and VLAN 20 is assigned to the HR department. Once configured, the switch ports are assigned to the appropriate VLANs based on the devices' needs.
4. Proper IP Addressing Scheme
A well-structured IP addressing scheme is vital for Router-on-a-Stick to function properly. Each VLAN should have its own subnet, and each subinterface on the router should have an IP address that falls within the corresponding VLAN’s subnet. These IP addresses will be used to route traffic between VLANs.
Example IP Scheme:
-
VLAN 10: 192.168.10.0/24
-
VLAN 20: 192.168.20.0/24
By assigning these subnets to their respective VLANs, the router can route traffic appropriately between VLANs.
5. Routing Configuration on the Router
Once the subinterfaces, trunking, VLANs, and IP addresses are configured, the router must be set up to route traffic between VLANs. This typically involves configuring routing protocols or static routes to enable communication between different subnets.
How Router-on-a-Stick Works
Once everything is configured, Router-on-a-Stick operates as follows:
-
A device in VLAN 10 sends a packet to a device in VLAN 20.
-
The switch forwards the packet to the router's trunk port.
-
The router receives the packet on the trunk link and forwards it to the correct subinterface based on the VLAN tag (in this case, VLAN 10).
-
The router checks its routing table to find the appropriate route to reach VLAN 20.
-
The router then sends the packet out of the subinterface corresponding to VLAN 20 and forwards it back to the switch, which delivers it to the correct device.
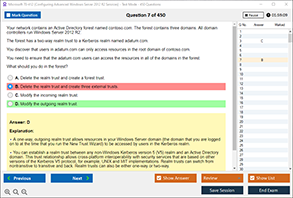
Free Sample Question
Q1: What is the primary purpose of Router-on-a-Stick in a network?
A) To increase the speed of the network
B) To provide routing between different VLANs
C) To act as a firewall between VLANs
D) To enable routing between IP subnets
Answer: B) To provide routing between different VLANs
Q2: Which encapsulation method is used in a Router-on-a-Stick configuration?
A) PPPoE
B) HDLC
C) 802.1Q
D) Frame Relay
Answer: C) 802.1Q
Q3: In a Router-on-a-Stick setup, which device connects the router to multiple VLANs?
A) A Layer 3 switch
B) A router subinterface
C) A trunk port on the router
D) A bridge
Answer: B) A router subinterface
Advantages of Router-on-a-Stick
Router-on-a-Stick offers several advantages:
-
Cost-Effective: It uses a single router interface, making it a cost-efficient solution compared to using multiple physical interfaces.
-
Simplicity: The setup is relatively simple and does not require complex hardware configurations.
-
Scalability: Although limited by a single router interface, it can be effective in smaller and medium-sized networks.
Conclusion
In conclusion, Router-on-a-Stick is an efficient and practical solution for inter-VLAN routing in smaller to medium-sized networks. It allows for segmentation of traffic while ensuring that devices on different VLANs can still communicate with each other. By using a single physical router interface and multiple subinterfaces, this technique simplifies network architecture and saves on hardware costs. To implement Router-on-a-Stick successfully, proper configuration of VLANs, subinterfaces, trunking, and routing protocols is essential. Understanding these requirements will enable network engineers to design and implement robust, efficient networks. Whether preparing for your CCNA exam or enhancing your network skills, Router-on-a-Stick is a crucial concept that every networking professional should master. For those studying for exams like CCNA, you can find more detailed study materials and practice questions on DumpsQueen to help you prepare and pass with confidence.